首先,我還是承認了吧,教程是從奶嘴那弄來的,為的也是方便自己,順帶方便下瀏覽使用者們!今天介紹的就是不使用外掛完成 WordPress 程式碼實現網站地圖 sitemap 的 html 和 xml 的方法,本站以前一直用著柳城的百度地圖外掛,今天心血來潮,想著還是直接程式碼吧,少用外掛的好!
下面我就直接說教程吧,當然現在開始你就可以卸掉了 WordPress 百度地圖的外掛了!

首先我先提供下 sitemap.php 的檔案吧:傳送門 將檔案下載下來,上傳到當前 WordPress 主題資料夾的根目錄,然後新建頁面,選擇站點地圖模板即可!這樣一個 html 的站點地圖就 OK 了。
然後我說下 xml 站點地圖的實現方法吧
在空間 WordPress 的根目錄下建立 xmlmap.php 檔案,內容為下面內容
- <?php
- require('./wp-blog-header.php');
- header("Content-type: text/xml");
- header('HTTP/1.1 200 OK');
- $posts_to_show = 1000;
- echo '<?xml version="1.0" encoding="UTF-8"?>';
- echo '<urlset xmlns:xsi="http://www.w3.org/2001/XMLSchema-instance" xmlns="http://www.sitemaps.org/schemas/sitemap/0.9"
- xsi:schemaLocation="http://www.sitemaps.org/schemas/sitemap/0.9 http://www.sitemaps.org/schemas/sitemap/0.9/sitemap.xsd">';
- ?>
- <!-- generated-on=<?php echo get_lastpostdate('blog'); ?>-->
- <url>
- <loc>http:
- <lastmod><?php echo get_lastpostdate('blog'); ?></lastmod>
- <changefreq>daily</changefreq>
- <priority>1.0</priority>
- </url>
- <?php
- header("Content-type: text/xml");
- $myposts = get_posts( "numberposts=" . $posts_to_show );
- foreach( $myposts as $post ) { ?>
- <url>
- <loc><?php the_permalink(); ?></loc>
- <lastmod><?php the_time('c') ?></lastmod>
- <changefreq>monthly</changefreq>
- <priority>0.6</priority>
- </url>
- <?php }
- </urlset>
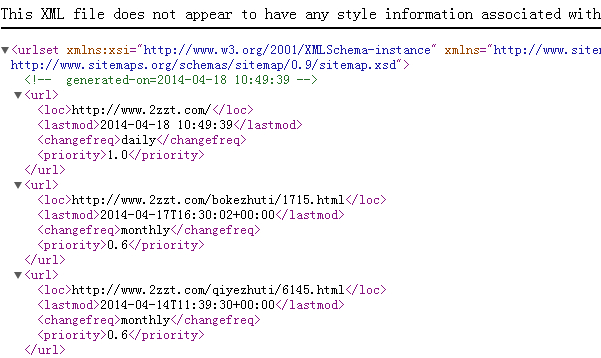
上傳到根目錄後,就是設定 url 轉發規則了,目的是讓 http://www.2zzt.com/sitemap.xml 能夠被訪問,當然這個 sitemap.xml 內容就是 xmlmap.php 的
根據不同的伺服器環境來設定 url 轉發規則!
首先是 apache 下的規則:
- RewriteEngine On
- RewriteBase /
- RewriteRule ^sitemap.xml$ xmlmap.php
將以上程式碼加入到.htaccess 檔案即可,接下來是 nginx 下規則:
- rewrite ^/sitemap.xml$ /xmlmap.php;
現在,WordPress 的 xml 站點地圖也 OK 了,這樣就可以剩下一款外掛了!