這篇我們完成對主題的樣式化和開始把 index.php 檔案分成多個小檔案。在這篇中,首先要對 style.css 檔案進行修改,然後把 index.php 分成一些新的檔案。
開啟 XAMPP,主題資料夾,Firefox,IE,index.php 和 style.css 。
第 1 步:樣式化 footer
給 footer DIV 增加 10px 頂部填充。你還記得如何增加填充?這次我不提供程式碼。
第 2 步:設定 footer P 的行距
給 footer 裡的所有的 P 標籤 18px 行距。那是 #footer p{}. 。 (今天關於 CSS 的就這麼多。)
第 3 步:header.php
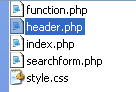
- 建立一個新檔案,把它命名為 header.php 。
- 在 index.php 檔案中,把 header DIV 及以上所有東西都複製到 header.php 檔案中。
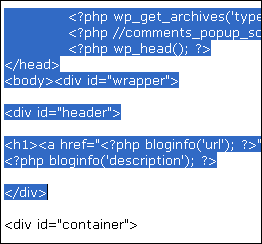
這是我的 header.php 檔案。不要從我的這裡複製,從你自己的 index.php 檔案複製。
第 4 步:在 index.php 中匯入 header.php
為了使所有從 index.php 中拷出的內容依然在 index.php 檔案中,輸入以下程式碼:
<?php get_header(); ?>
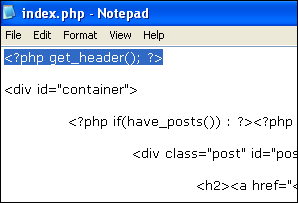
這是個 WordPress 主題系統特別用來匯入 header.php 檔案的函式,而不用使用 PHP 的函式:<?php include (TEMPLATEPATH . 『/header.php』); ?>.
儲存並重新整理瀏覽器,你應該看到沒有變化。如果你的改變破壞了主題,那麼肯定有錯誤。
第 4 步:sidebar.php
- 和第 4 步一樣,更多相同的事情。這次,建立 sidebar.php 檔案。
- 把 index.php 檔案中的 Sidebar DIV 從開始到結尾都複製到 sidebar.php 檔案中。
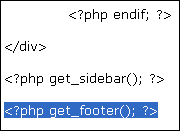
- 那麼,在 index.php 檔案,將其取代為:<?php get_sidebar(); ?>.
- 儲存並重新整理瀏覽器,再一次,你應該看到沒有變化。
- 這是我的 sidebar.php 檔案。

第 5 步:footer.php
- 為
footer.php重複上面的步驟。 - 這是我的 footer.php 檔案。
教程回顧
- 建立了三個新檔案:header.php,sidebar.php 和 footer.php 。
- 使用了三個新的函式:get_header(),get_sidebar() 和 get_footer()。
- 下面是這節課結束之後的檔案:index,style,header,sidebar,footer 。