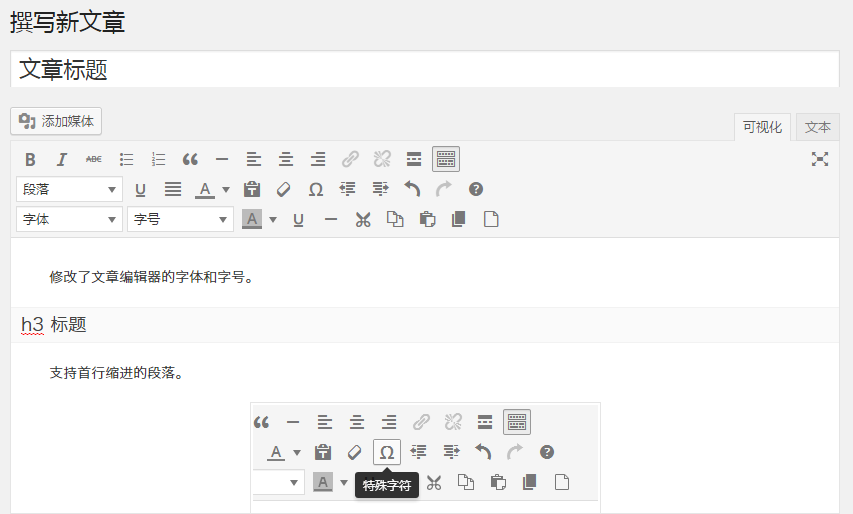
每一個 WordPress 主題的文章樣式都是不一樣的,但是在使用後臺的視覺化編輯器編輯文章的時候,樣式卻都是一致的。
但是 WordPress 提供了一個在文章視覺化編輯器中自定義樣式的功能,利用這個功能可以在 WordPress 視覺化編輯器裡自定義 CSS 樣式。
把視覺化編輯器的樣式設定成和前端一樣,可以方便使用者直接預覽出文章顯示在前端的結果,不用重新整理反覆的除錯文章排版樣式。
自定義文章編輯器的樣式
在文章編輯器新增一個自定義的 CSS 樣式表只需要使用 add_editor_style() 函式。
首先在你的主題根目錄建立一個 editor-style.css 樣式表檔案,然後在 functions.php 檔案裡新增:
|
/** *WordPress 自定義文章編輯器的樣式 *https://www.weixiaoduo.com/editor-style/ */ functionBing_add_editor_style(){ add_editor_style(); } add_action('after_setup_theme','Bing_add_editor_style'); |
這樣,editor-style.css 樣式表就會在視覺化編輯器裡引入了,在 editor-style.css 檔案裡書寫 CSS 就能直接體現在視覺化編輯器上。
自定義 CSS 檔案
除此之外,你還可以自定義 CSS 檔案的路徑:
|
/** *WordPress 自定義文章編輯器的樣式 *自定義 CSS 檔案 *https://www.weixiaoduo.com/editor-style/ */ functionBing_add_editor_style(){ add_editor_style('css/custom-editor-style.css');//這樣就會呼叫主題目錄 CSS 資料夾的 custom-editor-style.css 檔案 } add_action('after_setup_theme','Bing_add_editor_style'); |
這樣就會呼叫主題目錄的 「css/custom-editor-style.css」 檔案。
引入外部 CSS 檔案
add_editor_style() 函式還支援引入外部的 CSS 檔案:
|
/** *WordPress 自定義文章編輯器的樣式 *外部 CSS 檔案 *https://www.weixiaoduo.com/editor-style/ */ functionBing_add_editor_style(){ add_editor_style('http://cdn.bootcss.com/font-awesome/4.2.0/css/font-awesome.min.css');//引入外部的 CSS 檔案 } add_action('after_setup_theme','Bing_add_editor_style'); |
總結
自定義視覺化編輯器的樣式可以讓作者直接預覽到文章在前臺的效果,排版更加方便。