最近開發一個 WordPress 淘寶客主題,應客戶要求,需要做一個店鋪推廣。這個店鋪推廣需要上首頁,也就是說只有提供了贊助的的店長的連結才可以在首頁展示。為了達到這個目的,筆者提供的解決方案是採用置頂功能。店鋪採用 WordPress 自定義文章型別。然而問題來了,WordPress 自定義文章型別預設並不支援置頂功能。為此我們可以透過一個外掛來實現:Sticky Custom Post Types 。
一、新增 WordPress 自定義文章型別置頂功能
首先需要做的是安裝和啟用 Sticky Custom Post Types 外掛。然後到設定-閱讀進行設定讓哪一個 WordPress 支援置頂功能。如下圖:
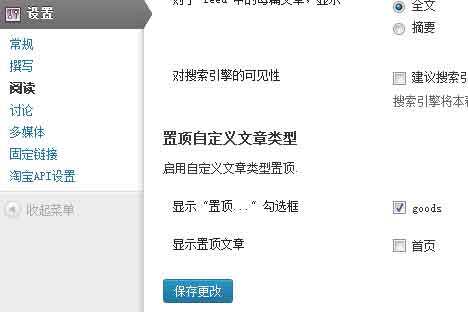
這裡有兩個選項,一個是設定自定義文章型別,一個是設定顯示在首頁。如果你的自定義文章型別不再首頁主迴圈之內,就無需勾選首頁。由於我那個專案自定義文章型別不在主迴圈之內,所以沒有勾選 「首頁」 。
但你設定之後,在釋出自定義文章型別文章的時候,你就會看到置頂功能:
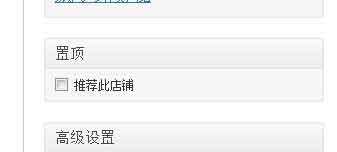
勾選即可。
二、如何顯示置頂自定義文章型別
關於顯示自定義置頂自定義文章型別有兩種方法。
1 、顯示在主迴圈之外。
這個方法可以顯示在特定區域如在主迴圈之上,如在側邊欄上。採用了方法是加上下面的程式碼:
<?php
 $sticky = get_option('sticky_posts');
 query_posts( array('post__in' => $sticky,'showposts' => 6,'caller_get_posts' => 1,'post_type'=>'goods' ) );?>
重點就是 $sticky = get_option(‘sticky_posts’) 和’post__in’ => $sticky 。
2 、顯示在主迴圈之內。
如果在首頁,則直接勾選設定中的首頁,但是如果要顯示在存檔頁呢?實際上這個外掛預設是不支援在存檔顯示置頂的,為此我們需要在 functions.php 中增加如下程式碼:
function wpb_cpt_sticky_at_top( $posts ) {

    // apply it on the archives only
    if ( is_main_query() && is_post_type_archive() ) {
        global $wp_query;

        $sticky_posts = get_option( 'sticky_posts' );
        $num_posts = count( $posts );
        $sticky_offset = 0;

        // Find the sticky posts
        for ($i = 0; $i < $num_posts; $i++) {

            // Put sticky posts at the top of the posts array
            if ( in_array( $posts[$i]->ID, $sticky_posts ) ) {
                $sticky_post = $posts[$i];

                // Remove sticky from current position
                array_splice( $posts, $i, 1 );

                // Move to front, after other stickies
                array_splice( $posts, $sticky_offset, 0, array($sticky_post) );
                $sticky_offset++;

                // Remove post from sticky posts array
                $offset = array_search($sticky_post->ID, $sticky_posts);
                unset( $sticky_posts[$offset] );
            }
        }

        // Look for more sticky posts if needed
        if ( !empty( $sticky_posts) ) {

            $stickies = get_posts( array(
                'post__in' => $sticky_posts,
                'post_type' => $wp_query->query_vars['post_type'],
                'post_status' => 'publish',
                'nopaging' => true
            ) );

            foreach ( $stickies as $sticky_post ) {
                array_splice( $posts, $sticky_offset, 0, array( $sticky_post ) );
                $sticky_offset++;
            }
        }

    }

    return $posts;
}

add_filter( 'the_posts', 'wpb_cpt_sticky_at_top' );

// Add sticky class in article title to style sticky posts differently

function cpt_sticky_class($classes) {
			if ( is_sticky() ) :
			$classes[] = 'sticky';
	        return $classes;
		endif;
		return $classes;
				}
	add_filter('post_class', 'cpt_sticky_class');
接下來你需要建立自定義文章型別存檔頁。
三、風格化置頂文章
如果你的主題裡使用了 post_class() 函式,那麼你就可以在你的樣式表中對主迴圈中的文章進行風格化,可以新增如何程式碼:
.sticky {
background-color:#ededed;
background-image:url('http://example.com/wp-content/uploads/featured.png');
background-repeat:no-repeat;
background-position:right top;
}
如果這個風格化還是不能滿足你的需求,那麼可以透過置頂函式進行判斷是否是置頂文章,然後再新增置頂樣式:
<?php if ( is_sticky() ) : ?>
 <span class="djzhiding dj_tuijian"></span>
 <?php endif;?>
我的一個專案的樣式如下:
span.djzhiding{ position: absolute; top: -10px; right: -11px; display: block; width: 101px; height: 101px; }
span.dj_tuijian { background: url(images/dj_tuijian.png) no-repeat; }
效果如下:

其中的熱銷推薦就是根據置頂新增的樣式。