WordPress Shortcode 即 WordPress 短代碼功能是在 WordPress 2.5 版本開始被引入,用户通過 WordPress 短代碼可以非常方便快速地在編輯文章或頁面的時候插入動態內容,短代碼的常見應用有插入最新文章、插入廣告、插入音頻視頻、插入下載按鈕等。博客吧給別人製作 WordPress 模板時,通過 WordPress Shortcode 實現了 page 頁面動態插入不同的幻燈片。
下面是 WordPress 短代碼的詳細介紹及高級應用。
WordPress 短代碼的使用非常簡單。比如説我們想顯示給定的最新文章,我們可以使用類似下面的代碼:
[recent-posts]
再進一步的,我們可以通過設定一個參數來控制現實的文章的數量:
[recent-posts posts="5"]
更進一步的,我們可以為文章列表增加一個標題:
[recent-posts posts="5"]Posts Heading[/recent-posts]
1. 簡單的短代碼
本教程的第一部分,我們將創建下面這個短代碼的代碼:
[recent-posts]
創建的過程非常簡單,不需要很高級的 PHP 知識。創建過程如下:
- 創建一個函數,當 WordPress 發現短代碼的時候會調用此函數;
- 通過設置一個唯一的名稱來註冊短代碼;
- 把註冊的函數綁定到 WordPress 的 action 上。
本教程的所有代碼都可以直接放到 functions.php 中,也可以放在一個將包含在 functions.php 的單獨的 PHP 文件中。
1.1 創建回調函數
當發現短代碼的時候,它會被一個稱作回調函數的一段代碼所代替,所以我們先創建一個函數,從數據庫中獲取最新的文章。
function recent_posts_function() { query_posts(array('orderby' => 'date'<span%20style="color: #339933;">, 'order' => 'DESC' , 'showposts' => 1)); if (have_posts()) : while (have_posts()) : the_post(); $return_string = '<a href="'<span%20style="color: #339933;">.get_permalink().'">'<span%20style="color: #339933;">.get_the_title().'</a>'<span%20style="color: #339933;">; endwhile; endif; wp_reset_query(); return $return_string;}
如上所示,我們查詢數據庫,獲取最新的文章,並返回一個帶有鏈接的字符串。值得注意的是,回調函數並不打印任何內容,而是返回一個字符串。
1.2 註冊短代碼
現在,我們告訴 WordPress 這個函數是一個短代碼:
function register_shortcodes(){ add_shortcode('recent-posts'<span%20style="color: #339933;">, 'recent_posts_function'<span%20style="color: #009900;">);}
當在文章的內容中發現短代碼
[recent-posts]
將會自動調用 recent_posts_function() 函數,我們需要確保短代碼的名字是唯一的,以避免重複。
1.3 Hook into WordPress
為了能夠執行 recent_posts_function() 函數,我們需要把它綁定在 WordPress 的初始化鈎子中。
add_action( 'init'<span%20style="color: #339933;">, 'register_shortcodes'<span%20style="color: #009900;">);
1.4 測試短代碼
簡單的短代碼已經準備好了,現在我們需要測試它是否能夠正常運行。我們創建一個新的文章 (或打開一個已存在的),把下面的代碼加入到文章內容中的某個位置:
[recent-posts]
發佈文章並在瀏覽器中打開,你將看到一個執行你最新文章的鏈接,如下圖所示:

2. 進階短代碼
2.1 短代碼參數
短代碼非常靈活,因為它允許我們添加參數以使它們具有更多的功能。假定我們需要顯示一定數量的最新文章。為了實現這個,我們需要給短代碼增加額外的選擇來指定顯示最新的多少篇文章。
我們需要使用兩個函數,第一個是 WordPress 內置的 shortcode_atts() 函數,它把用户的短代碼屬性與本地屬性結合在一起,並填充到所需要的位置。第二個是 PHP 的 extract() 函數,顧名思義,它提取短代碼的各個屬性。
擴展我們的回調函數,我們添加一個參數,它是一個數組,從中我們可以提取到我們需要獲取的文章的數量。我們查詢數據庫,獲取指定數量的文章,並返回一個列表:
function recent_posts_function($atts){ extract(shortcode_atts(array( 'posts' => 1, ), $atts)); $return_string = '<ul>'<span%20style="color: #339933;">; query_posts(array('orderby' => 'date'<span%20style="color: #339933;">, 'order' => 'DESC' , 'showposts' => $posts)); if (have_posts()) : while (have_posts()) : the_post(); $return_string .= '<li><a href="'<span%20style="color: #339933;">.get_permalink().'">'<span%20style="color: #339933;">.get_the_title().'</a></li>'<span%20style="color: #339933;">; endwhile; endif; $return_string .= '</ul>'<span%20style="color: #339933;">; wp_reset_query(); return $return_string;}
如果用户不指定該選項,1 將是默認值。我們可以添加更多的屬性,使短代碼接受更多的參數。用這個增強的函數,我們可以指定調用最新文章的數量:
[recent-posts posts="5"]
在瀏覽器中顯示時,你將看到最新的五篇文章列表:

2.2 短代碼中添加內容
我們可以更進一步擴展我們的短代碼,添加一些內容作為參數來傳遞,這將是最新文章列表的標題。為了實現此功能,我們需要在回調函數中增加第二個參數 $content ,並把它顯示在列表前面的一個 <h3> 標籤中。新的函數如下:
function recent_posts_function($atts, $content = null) { extract(shortcode_atts(array( 'posts' => 1, ), $atts)); $return_string = '<h3>'<span%20style="color: #339933;">.$content.'</h3>'<span%20style="color: #339933;">; $return_string .= '<ul>'<span%20style="color: #339933;">; query_posts(array('orderby' => 'date'<span%20style="color: #339933;">, 'order' => 'DESC' , 'showposts' => $posts)); if (have_posts()) : while (have_posts()) : the_post(); $return_string .= '<li><a href="'<span%20style="color: #339933;">.get_permalink().'">'<span%20style="color: #339933;">.get_the_title().'</a></li>'<span%20style="color: #339933;">; endwhile; endif; $return_string .= '</ul>'<span%20style="color: #339933;">; wp_reset_query(); return $return_string;}
這種短代碼類似於一個 HTML 標籤:
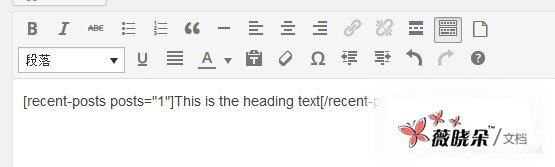
[recent-posts posts="5"]This is the list heading[/recent-posts]
除了文章列表多了一個標題,其餘的內容和上一個示例是一樣的:

3. 在任何地方顯示短代碼
3.1 在側邊欄小工具中使用短代碼
默認情況下,側邊欄小工具是忽略短代碼的,實例如下:
[recent-posts posts="5"]
如果你把這段代碼放在小工具裏的時候,你將看到類似下面的結果:

我們可以通過一行代碼來啓用這個函數,為了使側邊欄小工具支持短代碼,添加如下的代碼:
add_filter('widget_text'<span%20style="color: #339933;">, 'do_shortcode'<span%20style="color: #009900;">);
現在不需要修改其他任何地方,刷新一下頁面看看,側邊欄將會正確的顯示:

同樣的,在評論中啓用短代碼:
add_filter( 'comment_text'<span%20style="color: #339933;">, 'do_shortcode' );
在摘要中啓用短代碼:
add_filter( 'the_excerpt'<span%20style="color: #339933;">, 'do_shortcode'<span%20style="color: #009900;">);
4. TinyMCE 編輯器增加短代碼按鈕
雖然短代碼可以方便的為文章添加動態內容,但是這對於普通用户來説可能還是有點複雜,尤其是當參數比較多的時候。大多數用户對於類 HTML 代碼並不熟悉,然而要使用短代碼,他們必須記住具體的語法與參數,因為即使是一個小小的語法錯誤,都可能導致意想不到的結果。
要解決這個,我們可以給 TinyMCE 編輯器增加一個按鈕,使用户可以通過簡單的單擊來增加短代碼。創建這個按鈕僅需兩個步驟:
- 為這個按鈕創建一個 JS 文件
- 註冊按鈕與 JS 文件
4.1 通過 JS 文件創建按鈕
JS 文件是通過 TinyMCE API 來註冊 TinyMCE 插件的。我們在主題的 js 文件夾下創建 recent-posts.js ,並貼進去下面的代碼 (需要把圖片文件也放在這裏):
(function() { tinymce.create('tinymce.plugins.recentposts'<span%20style="color: #339933;">, { init : function(ed, url) { ed.addButton('recentposts'<span%20style="color: #339933;">, { title : 'Recent posts'<span%20style="color: #339933;">, image : url+'/recentpostsbutton.png'<span%20style="color: #339933;">, onclick : function() { var posts = prompt("調用文章數量", "1"); var text = prompt("列表標題", "這裏是文章列表標題"); if (text != null && text != ''<span%20style="color: #009900;">){ if (posts != null && posts != ''<span%20style="color: #009900;">) ed.execCommand('mceInsertContent'<span%20style="color: #339933;">, false, '[recent-posts posts="'<span%20style="color: #339933;">+posts+'"]'<span%20style="color: #339933;">+text+'[/recent-posts]'<span%20style="color: #009900;">); else ed.execCommand('mceInsertContent'<span%20style="color: #339933;">, false, '[recent-posts]'<span%20style="color: #339933;">+text+'[/recent-posts]'<span%20style="color: #009900;">); } else{ if (posts != null && posts != ''<span%20style="color: #009900;">) ed.execCommand('mceInsertContent'<span%20style="color: #339933;">, false, '[recent-posts posts="'<span%20style="color: #339933;">+posts+'"]'<span%20style="color: #009900;">); else ed.execCommand('mceInsertContent'<span%20style="color: #339933;">, false, '[recent-posts]'<span%20style="color: #009900;">); } } }); }, createControl : function(n, cm) { return null; }, getInfo : function() { return { longname : "Recent Posts", author : 'Specs'<span%20style="color: #339933;">, authorurl : 'http://9iphp.com'<span%20style="color: #339933;">, infourl : 'http://9iphp.com/opensystem/WordPress/1094.html'<span%20style="color: #339933;">, version : "1.0" }; } }); tinymce.PluginManager.add('recentposts'<span%20style="color: #339933;">, tinymce.plugins.recentposts);})();
我們通過調用 tinymce.create() 創建了一個插件。代碼中最重要的是 init() 函數,我們定義了一個名字,一個圖標文件及 onclick() 事件處理程序。
在 onclick() 函數的前兩行,彈出兩個對話框讓用户輸入調用文章數量及列表標題兩個參數,然後根據用户輸入,把生成的短代碼插入到編輯器中。
最後,TinyMCE 插件通過 add() 函數添加到 PluginManager 。現在我們已經成功的整合了 [recent-posts] 短代碼到 WordPress 中。
4.2 註冊按鈕及 TinyMCE 插件
創建完 JS 文件後,我們現在需要註冊它和短代碼按鈕。所以我們創建兩個函數並把它們綁定到合適的 WordPress 過濾器中。
第一個叫做 register_button() 的函數把短代碼添加到按鈕數組中,在現有按鈕和新按鈕之間添加分割線。
function register_button( $buttons ) { array_push( $buttons, "|", "recentposts" ); return $buttons;}
第二個函數 add_plugin() 指出 JS 文件的路徑及文件名。
function add_plugin( $plugin_array ) { $plugin_array['recentposts'<span%20style="color: #009900;">] = get_template_directory_uri() . '/js/recent-posts.js'<span%20style="color: #339933;">; return $plugin_array;}
下一步是添加包含前面兩個函數的過濾器。 register_button() 函數綁定到 mce_buttons 過濾器,這個會在編輯器加載插件的時候執行; add_plugin() 函數綁定到 mce_external_plugins 過濾器,當加載按鈕的時候執行。
function my_recent_posts_button() { if ( ! current_user_can('edit_posts'<span%20style="color: #009900;">) && ! current_user_can('edit_pages'<span%20style="color: #009900;">) ) { return; } if ( get_user_option('rich_editing'<span%20style="color: #009900;">) == 'true' ) { add_filter( 'mce_external_plugins'<span%20style="color: #339933;">, 'add_plugin' ); add_filter( 'mce_buttons'<span%20style="color: #339933;">, 'register_button' ); } }
當用户沒有對文章在可視化編輯器中編輯的權限時,前面的函數不會執行。
最後把函數勾到 WordPress 初始化函數
add_action('init'<span%20style="color: #339933;">, 'my_recent_posts_button'<span%20style="color: #009900;">);
4.3 按鈕用法
為了檢測代碼是否正確,我們打開一篇新的文章,這時一個我們剛剛定義的按鈕是不是已經出現在第一行的末尾了?如下圖所示:

點擊按鈕的時候,會彈出對話框讓我們輸入調用文章的數量:

輸入完點擊確定後,會彈出第二個對話框,讓我們輸入列表的標題:

參數留空的話,不會出現在最後的代碼中。最後,短代碼會添加到編輯器中: