WordPress 有自带的搜索功能,但是这个自带的搜索功能不仅搜索结果匹配度很低,而且也会影响到服务器的性能。做搜索比较牛逼的就是 Google 搜索引擎,那我们能不能将 google 的搜索技术应用到我们站内的搜索呢?答案是可以的。下面 WordPress 教程网为大家介绍 WordPress 整合 Google 自定义搜索的两种方式:
简洁版整合 (搜索结果使用 Google 的域名)
这个方法比较简单:只要复制并粘贴此代码即可。
首页访问:http://www.google.com/cse/tools/create_onthefly?hl=zh-CN
复制选框中的搜索代码替换你网站的搜索代码即可。搜索框的样式为 Google 定义的,可以通过 js 来改变搜索框和搜索按钮的样式。本站实例:
<!-- 本教程由 WordPress 教程网 (http://www.wpnoob.cn) 提供 -->
<!-- 使用该代码即表示您同意接受 Google 自定义搜索服务条款。 -->
<!-- 有关服务条款,请访问 http://www.google.com/cse/docs/tos.html?hl=zh-CN -->
<form name="search-form"  id="searchbox_demo" action="http://www.google.com/cse">
  <input type="hidden" name="cref" value="" />
  <input type="hidden" name="ie" value="utf-8" />
  <input type="hidden" name="hl" value="zh-CN" />
  <input  name="q" type="text"  />
  <input type="submit" name="sa"   value="搜索" />
</form>
<script type="text/javascript" src="http://www.google.com/cse/tools/onthefly?form=searchbox_demo&lang=zh-CN"></script>
<script>
//通过 js 来控制搜索框的样式
$(function() {
$(".search-input").css({"padding":"3px 8px"});
})
</script>
自定义版整合 (搜索结果使用自己网站的域名)
在简洁版中的搜索结果显示的域名是 google 的,如果我们想要自己的域名作为搜索结果怎么设置呢?方法如下:
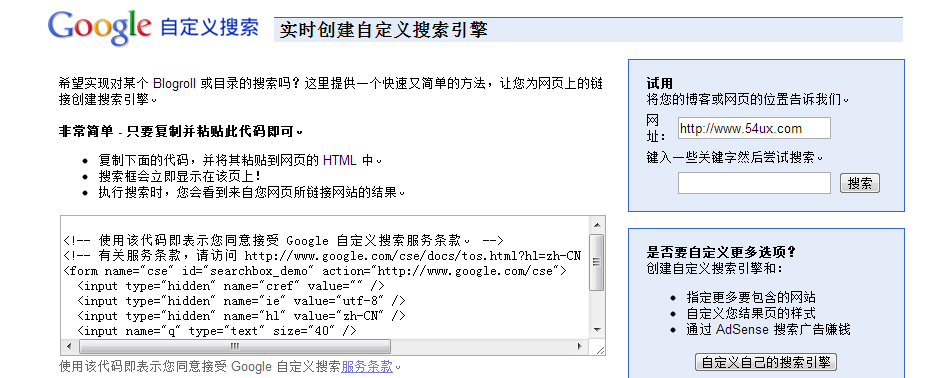
第一步:注册 Google 自定义搜索引擎
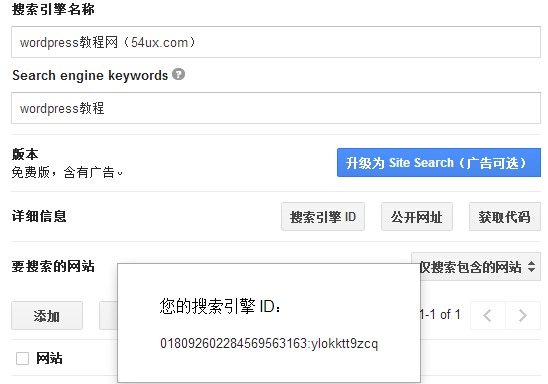
首先,我们需要到 Google 上面去注册一个自己的搜索引擎。访问 http://www.google.com/cse/,用你的 Google 账户登录之后,创建新的搜索引擎。
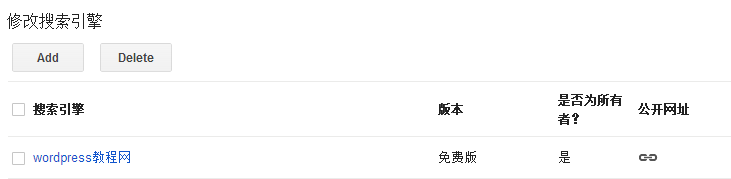
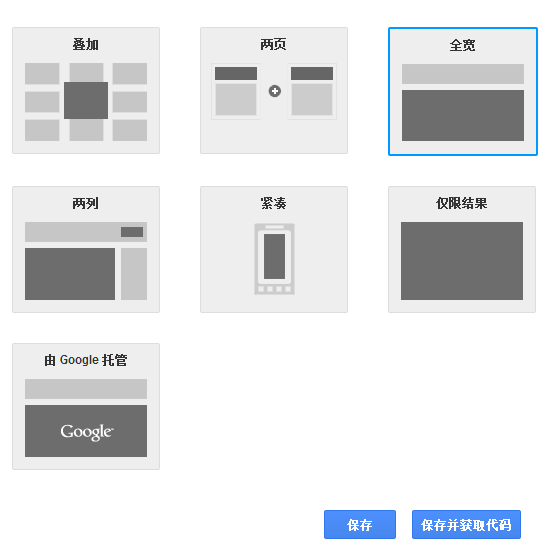
通过点击 「ADD」 按钮来添加你网站的搜索引擎,这样可以限定搜索为站内搜索。设置完成后进入 「外观」 选择好布局后点击 「保存并获取代码」
<script>
  (function() {
    var cx = '018092602284569563163:ylokktt9zcq';
    var gcse = document.createElement('script');
    gcse.type = 'text/javascript';
    gcse.async = true;
    gcse.src = (document.location.protocol == 'https:' ? 'https:' : 'http:') +
        '//www.google.com/cse/cse.js?cx=' + cx;
    var s = document.getElementsByTagName('script')[0];
    s.parentNode.insertBefore(gcse, s);
  })();
</script>
<gcse:search></gcse:search>
第二步:创建搜索结果页
为了让搜索结果在博客内部显示,我们需要在 WordPress 中创建一个新的页面,用来显示搜索的搜索结果。我们在本地新建一个文件,命名为 search.php,文件内容复制下面的即可:
<?php
/*
Template Name: search
*/
?>
<?php get_header(); ?>
<div id="cse" style="width: 100%;">Loading</div>
<script src="http://www.google.com.hk/jsapi" type="text/javascript"></script>
<script type="text/javascript">
  google.load('search', '1', {language : 'zh-CN'});
  google.setOnLoadCallback(function(){
        var customSearchControl = new google.search.CustomSearchControl('你的 Google 自定义搜索 ID');
        customSearchControl.setResultSetSize(google.search.Search.FILTERED_CSE_RESULTSET);
        customSearchControl.draw('cse');
    });
</script>
<link rel="stylesheet" href="http://www.google.com.hk/cse/style/look/shiny.css" type="text/css" />
<?php get_footer(); ?>
其中将 「你的 Google 自定义搜索 ID」 替换为 Google 给你的 「搜索引擎的唯一 ID」,可以在控制面板的基本信息内获取。
保存后将 search.php 上传至你的主题根目录下。 search.php 文件中的样式控制需要根据你网站实例来设置。
最后在你博客的后台 – 页面中新建页面,在页面属性的模版中找到 search 并选择,写好标题发布即可。
第三步:修改当前主题的搜索提交的表单
这里算是最关键的一步啦,就是当用户点击你博客上任意页面的站内搜索按钮的时候,将用户引导到你刚刚创建的搜索结果页上。这里我们需要在主题文件夹中找到搜索框所在的文件,每个主题都不同,我用我在使用的一款主题来演示吧,找到类似以下的代码:
<?php
//搜索
?>
<form method="get"  action="/search" >
<input  name="q" type="text" placeholder="输入 回车搜索" autofocus x-webkit-speech="" onfocus="if (this.value == '输入 回车搜索') {this.value = '';}" onblur="if (this.value == '') {this.value = '输入 回车搜索';}" value="<?php echo $_GET['s']?$_GET['s']:'输入 回车搜索'?>"><input type="submit" value="搜索" >
</form>
其中我们需要修改的地方大致如下:
- method=」get」
- action=」/search」
- 还有文本框 name=」q」
注意:*action 的地址可以根据你自己固定链接的方式来修改,只要保证能访问到我们刚新建的页面就行;不管你原先主题搜索框的 name 等于什么,都将引号内的字母改成 q 。
第四步:初始化搜索关键字
这是无缝整合 Google 自定义搜索框的最后一步,完成他你就大功告成了哦。这一步我们要做的是:从 URL 中提取浏览者搜索的关键词,然后调用 Google API 进行搜索。听起来很复杂?无需理解,简单的跟着做就可以了:
打开我们刚才新建的 search.php,在 Google 的代码 customSearchControl.draw(『cse』, options); 后插入以下代码:
var match = location.search.match(/q=([^&]*)(&|$)/);
if(match && match[1]){
    var search = decodeURIComponent(match[1]);
customSearchControl.execute(search);
}
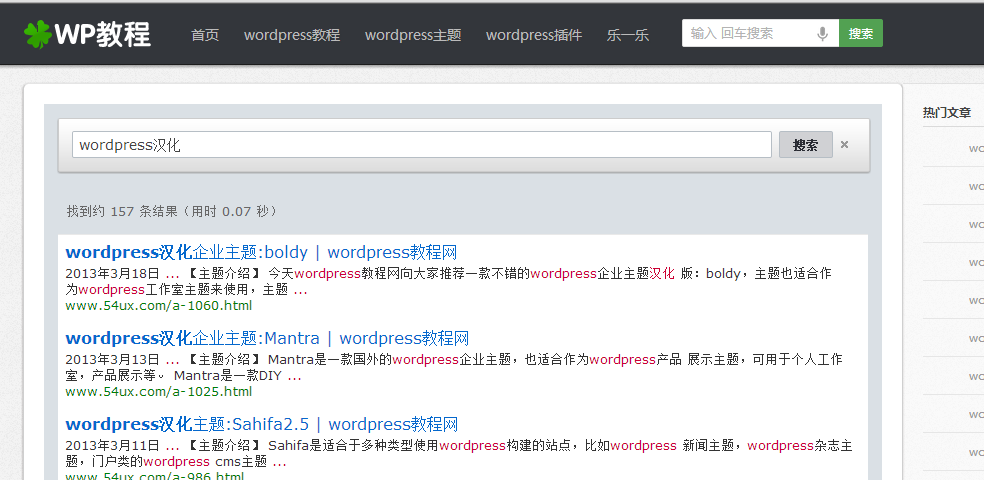
大功告成啦,从此以后你依旧可以使用主题原始的搜索框而享受 Google 自定义搜索带来的好处。以下是本站成功配置后的效果图: